Rendering a Test Shot
After finishing the previz and making sure that the story works, the next step is usually animating. However, there’s another step that is highly recommended, and it is finishing an entire shot from beginning to end, including a render test. In this post I’ll take you through my visual development process including how I made 3D animation look like hand drawn 2D animation.
When I was in school, working on my first animated short, I didn’t understand why this process was important, rather than working on each step at a time (animating, texturing, lighting, rendering, coloring, etc…).
After I did it though, I realized how important that step was. When I went through everything it took to finish a shot, I learned so much about my film and the things I needed to be prepared for.
For example, at first I wanted the film to be stylized as clay stop motion, but after rendering an entire shot I found that it didn’t work for the film I was trying to make. Can you imagine how bad it would have been if I realized it after animating the whole film as if it was claymation? Animating on 2’s? I would have to either redo everything or settle for a style that didn’t work so well for me. That’s why it’s so important to have one shot ready before you go deeper into animation and all the other steps that come after.
Deciding on a style
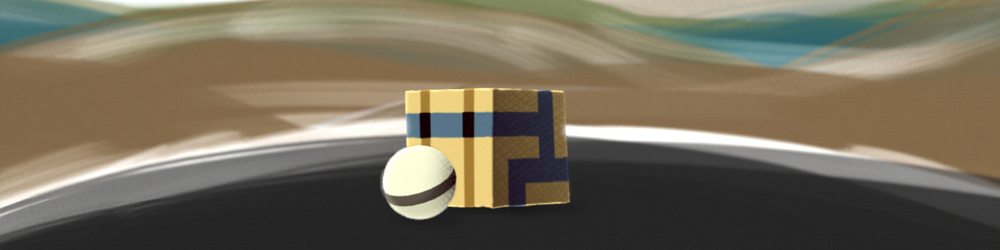
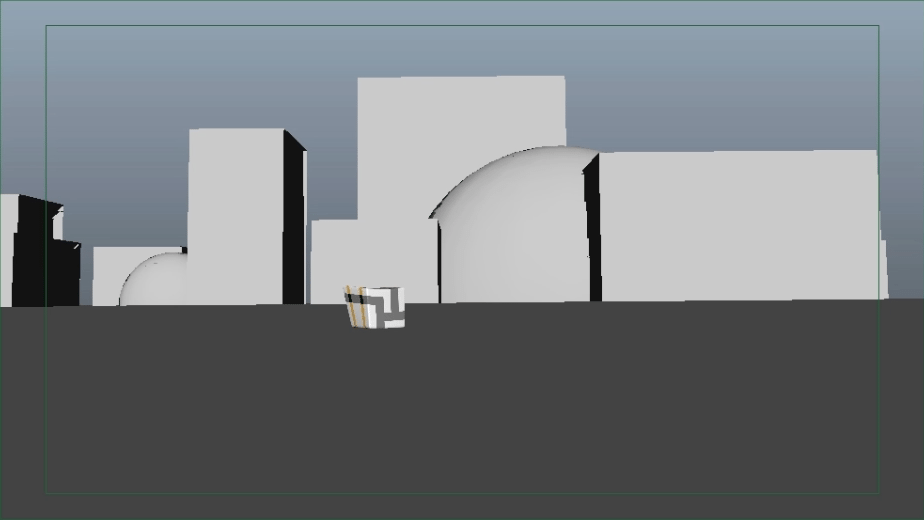
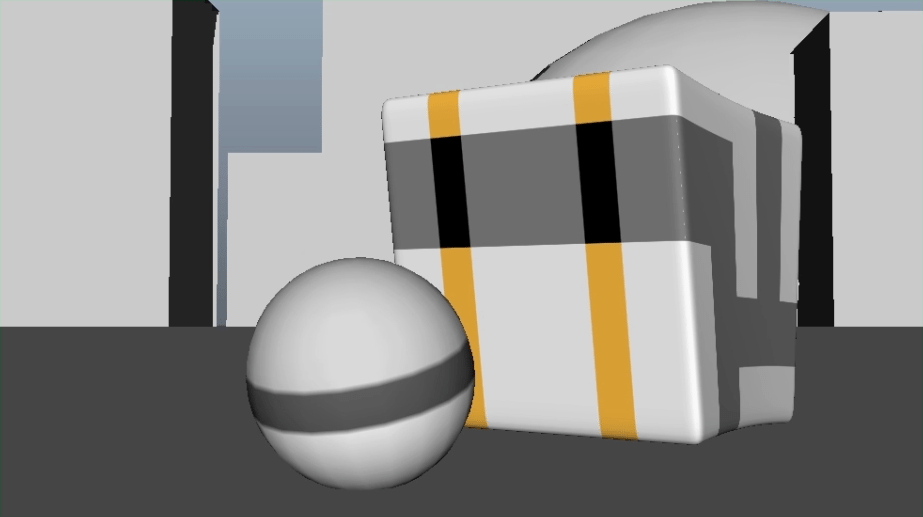
As I was developing the previz, I build a basic background and assigned basic textures to the ball and the cube. I had a simple vision of a geometric world where all the objects were rectangular or circular. That’s why the “buildings” in the background are just huge cubes and balls.
As I was trying to decide on the render style I was going to go with, I ran into an old tutorial from a great animation blog (that has been shut down for a while) by Keith Lango. In this tutorial he demonstrated how to get a 2D hand drawn look from a 3D render. The method he was using is applying a wobble deformer on the geometry to make it look a little different every frame (much like a 2D animated film would look) and adding Maya’s Toon Outline with some noise on it to make the lines wiggle. That, combined with animating on 2’s, created a very realistic hand drawn feel:
I decided that going with the 2D hand drawn style could be a fun experience, and since my short is quite simple – it could give it a unique quality. So I followed the steps and tried making it look like 2D.
It turns out that it’s not as easy as it looks.
How did I approach making 3D look like 2D?
First of all I changed the frame rate from 24fps to 12fps. That would simulate animating on 2’s which is the traditional approach in 2D (to learn more about the differences between 2D and 3D animation – watch this video). I also didn’t have moving holds (moving hold is when you subtly animate your character when it’s not moving to give it life) since I was going to have that wobble effect and wiggly outlines keeping things alive. After animating one shot from beginning to end I rendered a frame.
I used the Toon Outlines and added a quickly drawn background (to go with the hand drawn style) but unfortunately my result looked like a cell shaded video game from 2002:
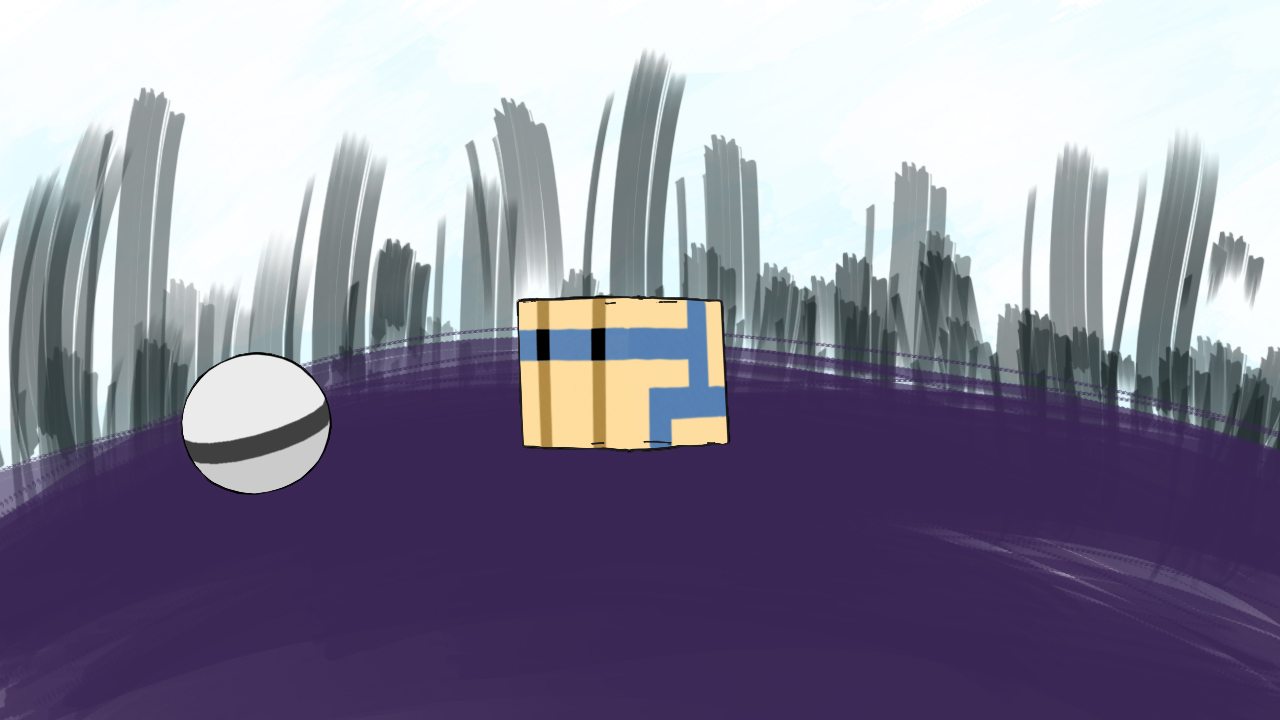
Pretty ugly huh?
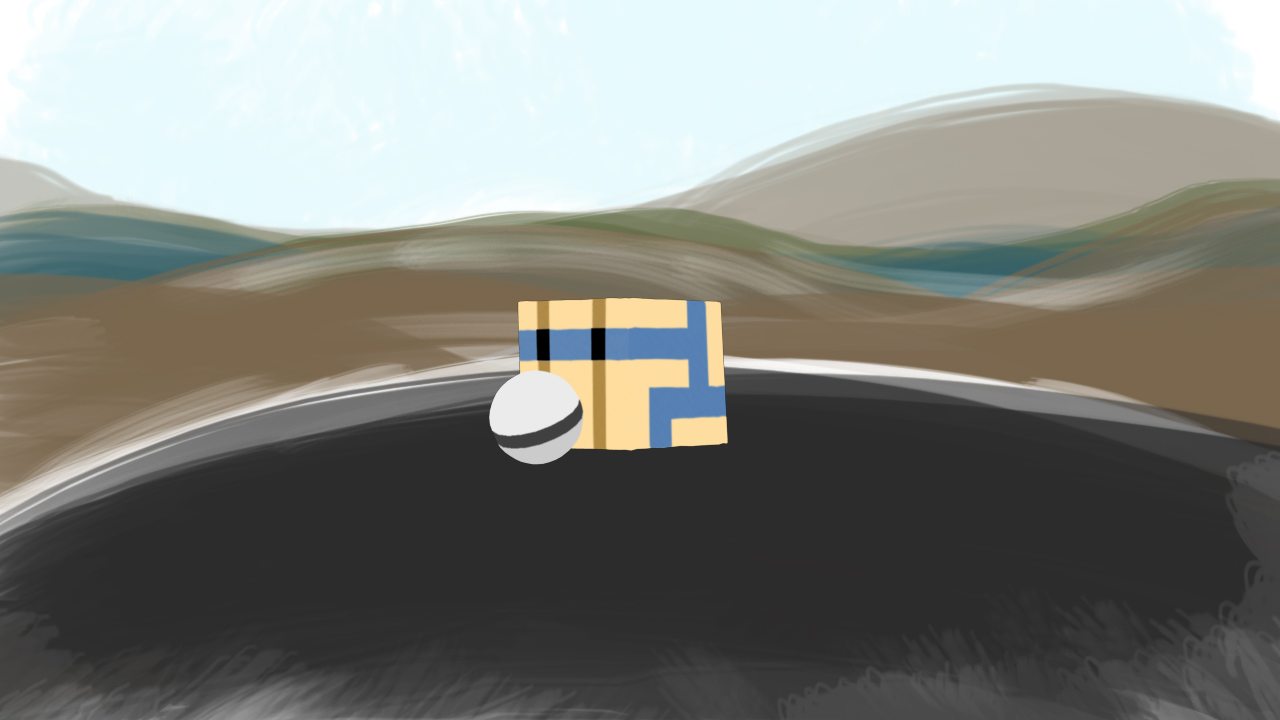
The hand drawn replacement of the geometrical buildings wasn’t working at all, but before I could draw any conclusion I needed to see it in motion. So I redrew the background to be more natural and rendered the characters. Here’s the result:
So the background is definitely heading in better direction, but I was still not in love with those black outlines. They made it look dated and dirty. I tried adjusting the width and the color but eventually I thought to check what it looks like without them. Here’s the result:
Much better!
I felt that this was finally going in a direction that I liked. The characters and the background felt more like they belong in the same world and the frame in whole seemed more painterly. I decided to push it as far as I could.
I rendered everything in Maya Software and with some compositing magic in Nuke (of which I’ll explain in more detail on another tutorial) I made it look like this:
Pretty cool right?
The background is more of a placeholder still, and the animation is not totally finished, but I think I landed on a style that I really like. I started with following someone else’s idea and slowly turned it into something unique.
This is why the process of finishing a shot is so important, now I have a much clearer idea of what the film is going to look like. The background is not what I thought it’ll be, I’m animating on 2’s, and my characters wobble. These are all things one should know before animating each and every shot.
If you want to learn more about character animation in Maya, check out our Maya Animation Course.
Previous step: Previsualization
Next step: Camera Shots and Angles
Making an Animated Short (FREE ebook)
A free ebook covering the process of making an animated short film from start to finish.