How to Animate in Procreate (skip this if you already know how)
If you haven’t been using Procreate to animate, you’re missing out. Back in 2019, Procreate added its animation assist tool, creating arguably the easiest way to animate on the iPad. You don’t need any prior knowledge of complex animation software, or even animation knowledge. If you can draw, you can animate with Procreate.
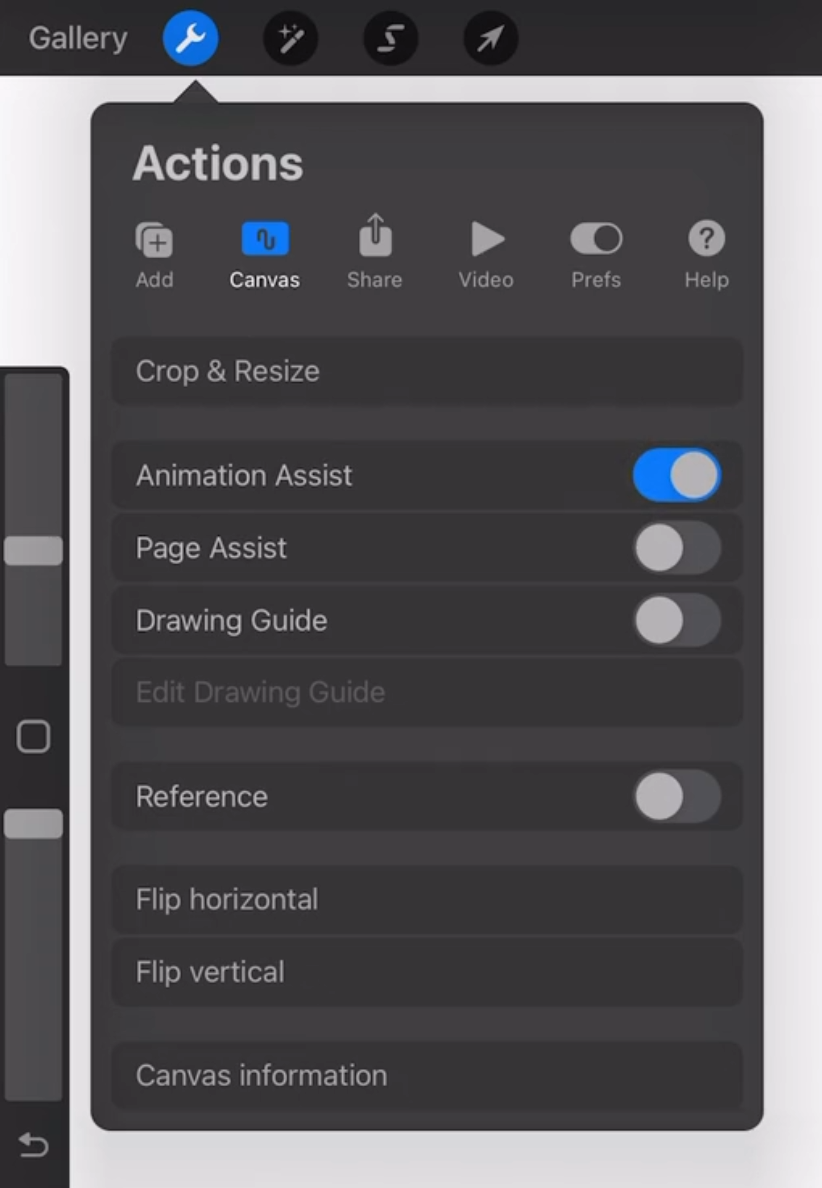
To begin, simply navigate to Actions > Canvas > Animation Assist.
Once activated, you’ll notice a timeline is displayed at the bottom of your canvas, complete with a play button. This feature transforms your layers and layer groups into the frames of your animation.
Creating animations in Procreate is very straightforward. Just draw on one layer, add another, and continue building your animation sequence. When you’re ready, click play, and watch as your drawings spring to life. It truly is that simple.
Once you’ve become comfortable with animating on Procreate, it’s time to level up your game with the following five expert tips. All these tips come from our complete course on iPad Animation, which includes a deep dive on the entire animation pipeline – from scripting, to storyboarding, to animating, to compositing – all on the iPad.
1. The Best Way to Organize Your Frames
While Procreate simplifies animation, your canvas layers can quickly become disorganized without a proper organization method. In order to keep things tidy, it’s best to use Procreate’s natural way of organizing layers to your advantage.
Instead of simply animating on layers, we recommend creating group layers for each of your animations’ frames. These group layers include:
- The rough frame sketch
- The clean line
- Your color layer
- Any notes you have about the frame (action, fixes, etc.)
- Any shading/highlights (check out tip 5 in this list)
Besides being well-organized, this makes it easy to turn on/off specific layers, change the opacity of layers, or copy/paste drawings between different group layers.
It’s also a good idea to rename your group layers with a simple naming convention like Frame 1, Frame 2, etc. This makes finding and sorting between drawings easier.
2. Conquer Onion Skin Advanced Options
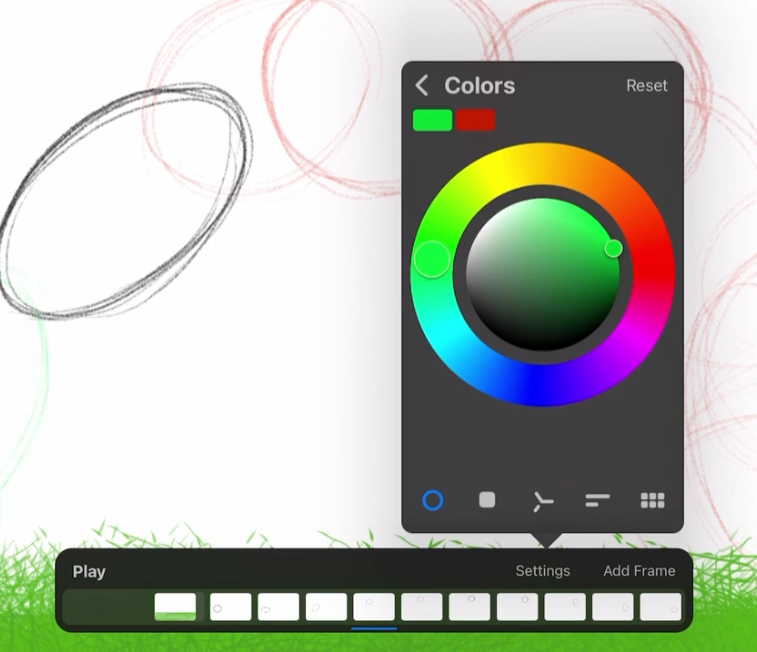
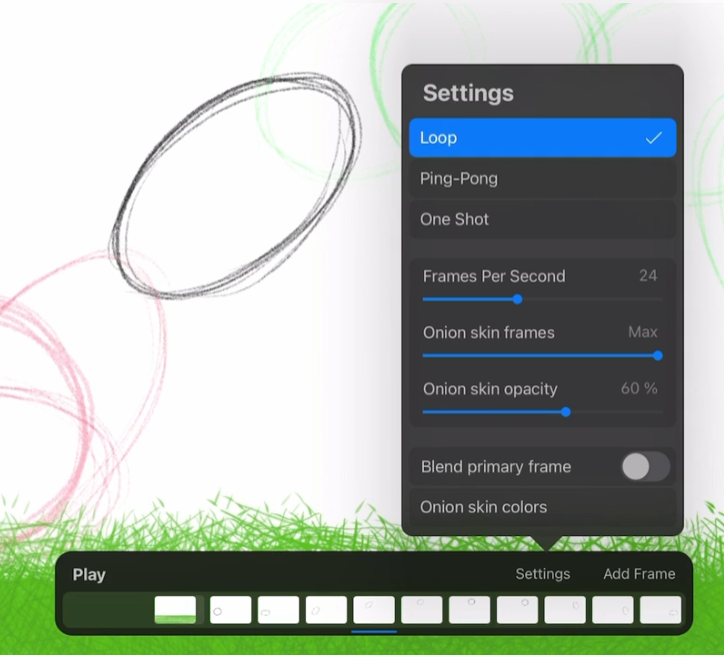
Have you ever tried to use onion skin on a character with the same colored lines as the onion skin? It’s nearly impossible to tell which line is which.
Fortunately, Procreate solves this by letting you customize the color of your onion skin. To do this, simply click on Settings in your animation timeline. Then click Onion skin colors, and use the color wheel to pick whichever two colors you prefer.
Additionally, you can adjust the opacity of your onion skin and specify the number of frames included before and after the current frame.
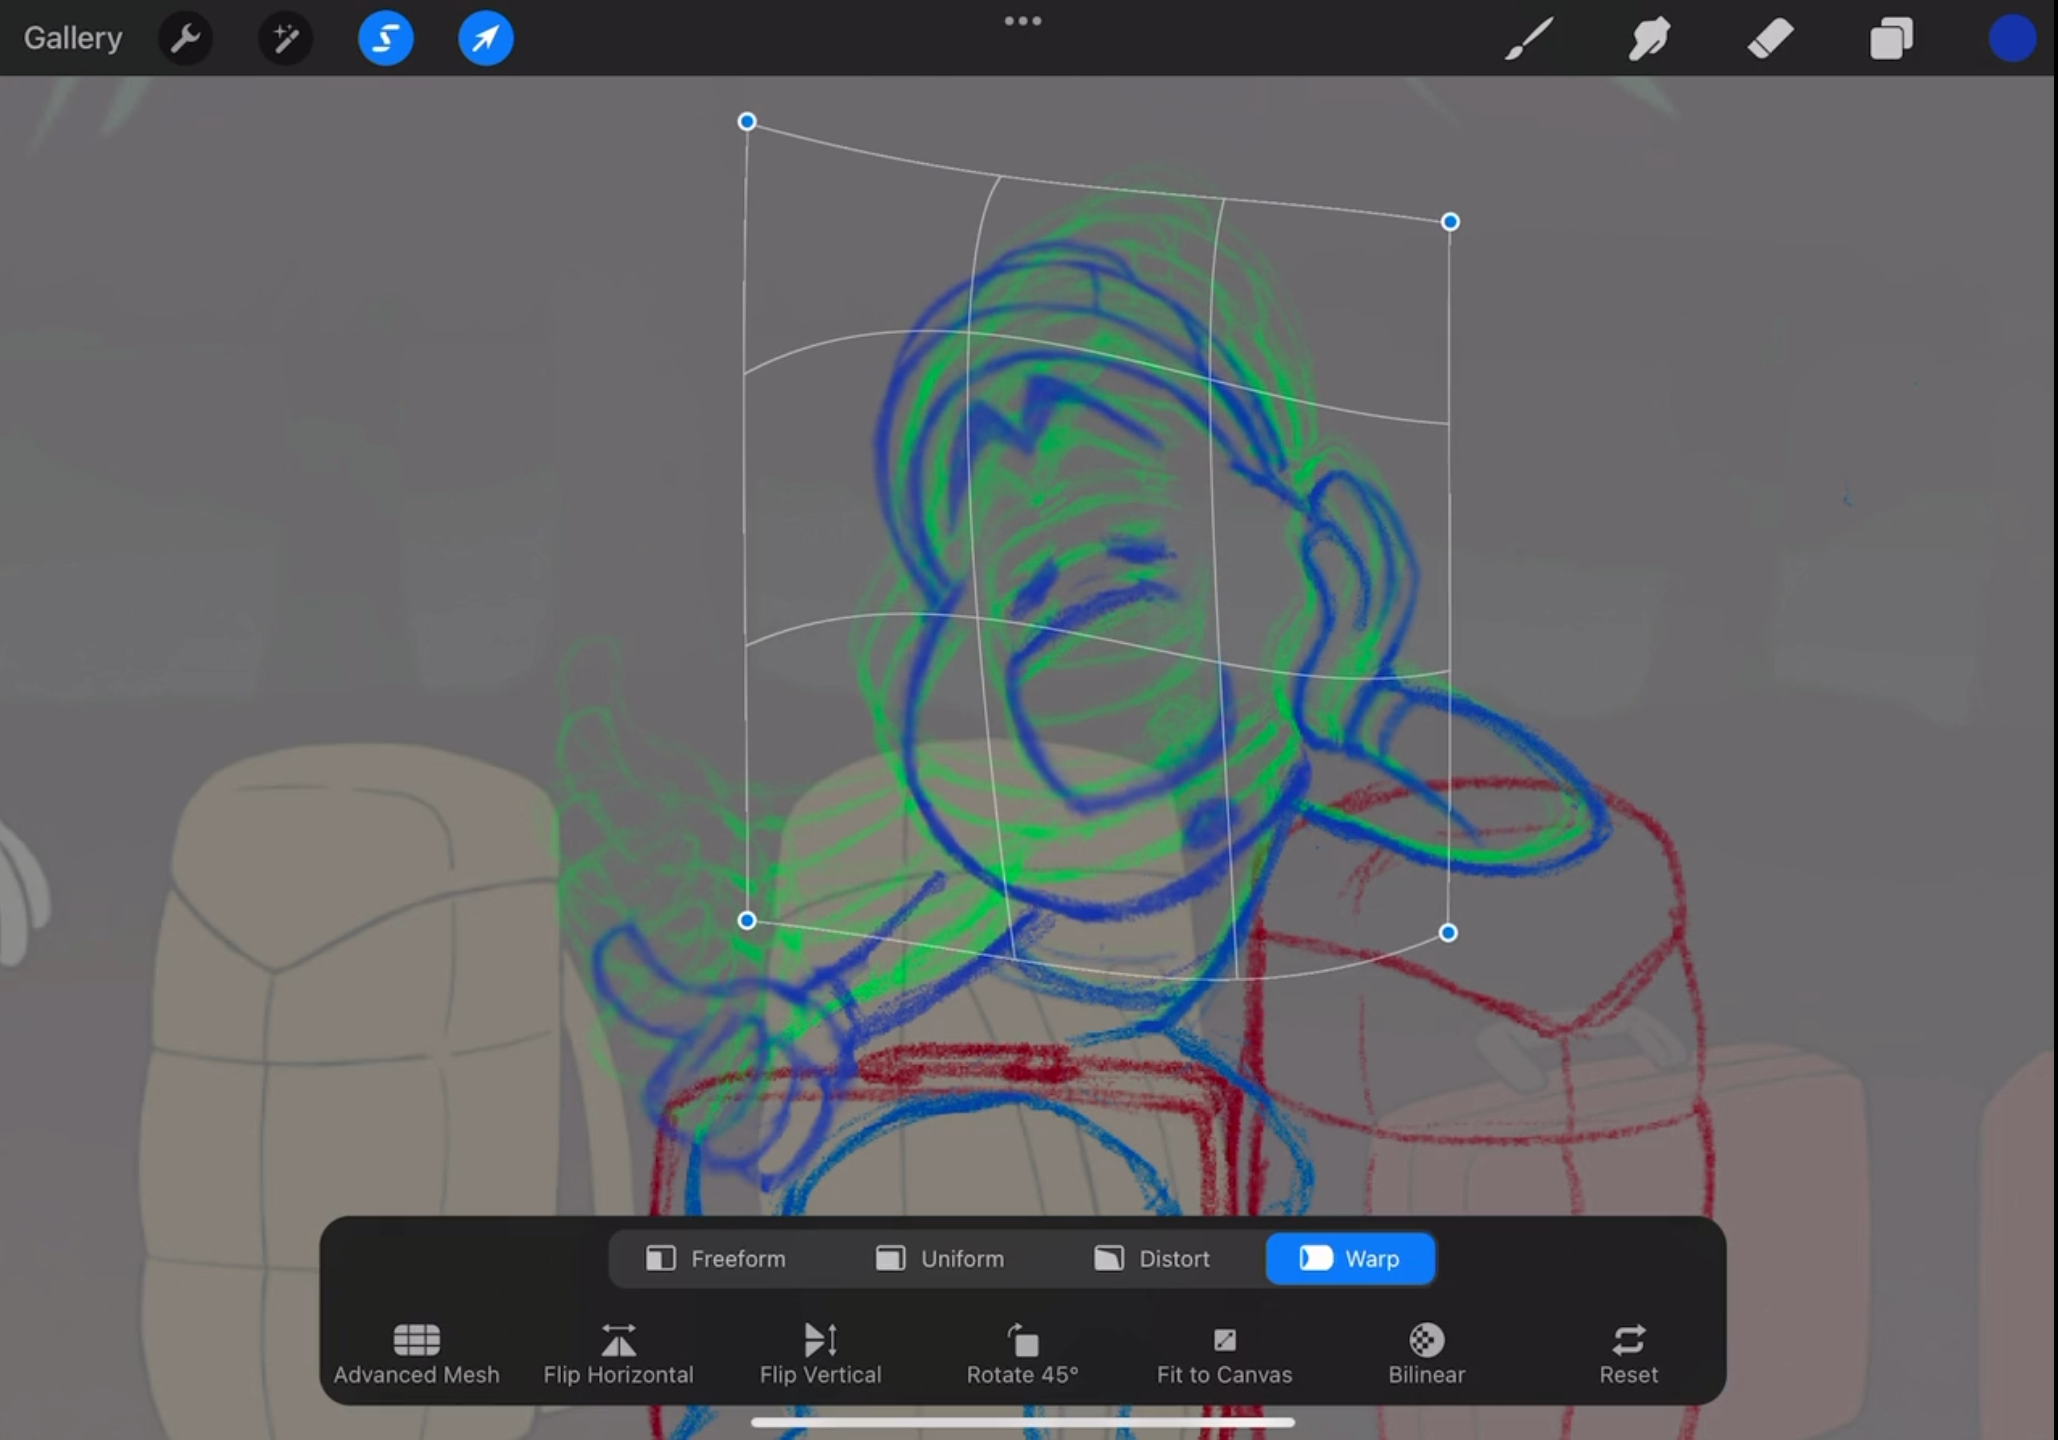
3. The Tool that Makes Keyframing Effortless
Have you ever painstakingly drawn all your keyframes, only to discover inconsistencies in your character’s proportions over time? One frame might feature an oversized head, while another might have an arm that’s too short.
Instead of continuously referencing your character model, simply use Procreate’s Warp tool.
For example, once you’ve accurately drawn your character’s head, simply copy and paste it onto subsequent keyframes. Then, use the Warp tool to adjust it to the desired pose. This will give you a general idea of where proportions should be, enabling you to refine them further with draw-overs.
This technique can especially save a lot of time if you’re animating in a squash-and-stretch style.
4. The Easiest Way to Color Your Frames
If you’re familiar with Procreate, you already know how simple it is to color your line art – simply drag a color into a shape and it will autofill.
However, if you’re coloring your frames on the same layer as your line art, you may run into some problems – it can become difficult to see your onion skin, and re-editing colored frames can create pixelated edges.
That’s why it’s best to color your art on a separate layer – making it easy to turn on/off, change colors, and spot mistakes – leaving your line art intact.
To do so, simply select your line art and duplicate it. Rename this new layer ‘Color’ and use it to color your frames.
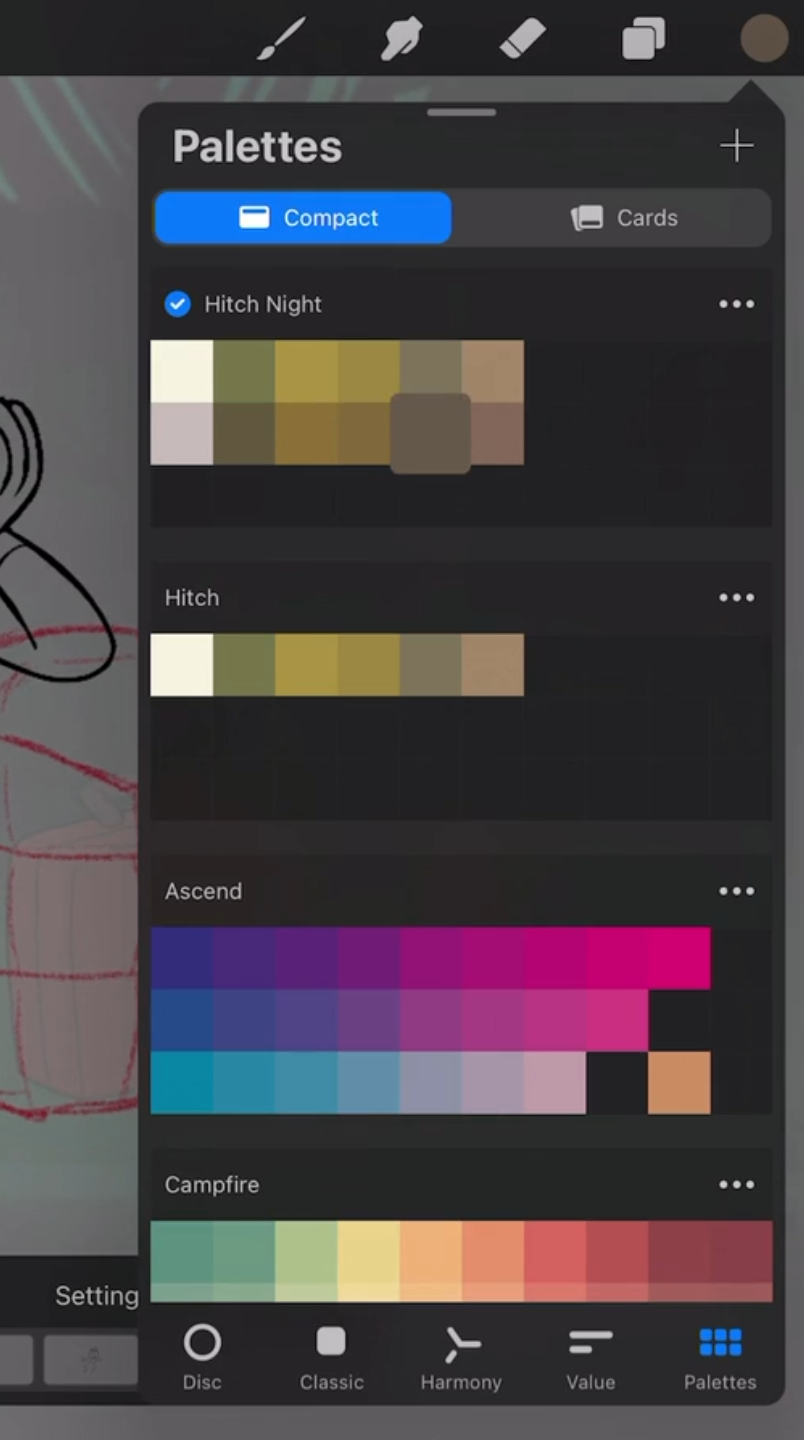
What’s more is Procreate allows you to create custom palettes. This is a great tool for easily and quickly coloring your characters consistently across frames.
To create a custom palette, simply open the color panel and select the Palettes tab, and tap the + symbol in the top corner. We recommend creating a palette for each of your characters, as well as your background.
It’s really that easy.
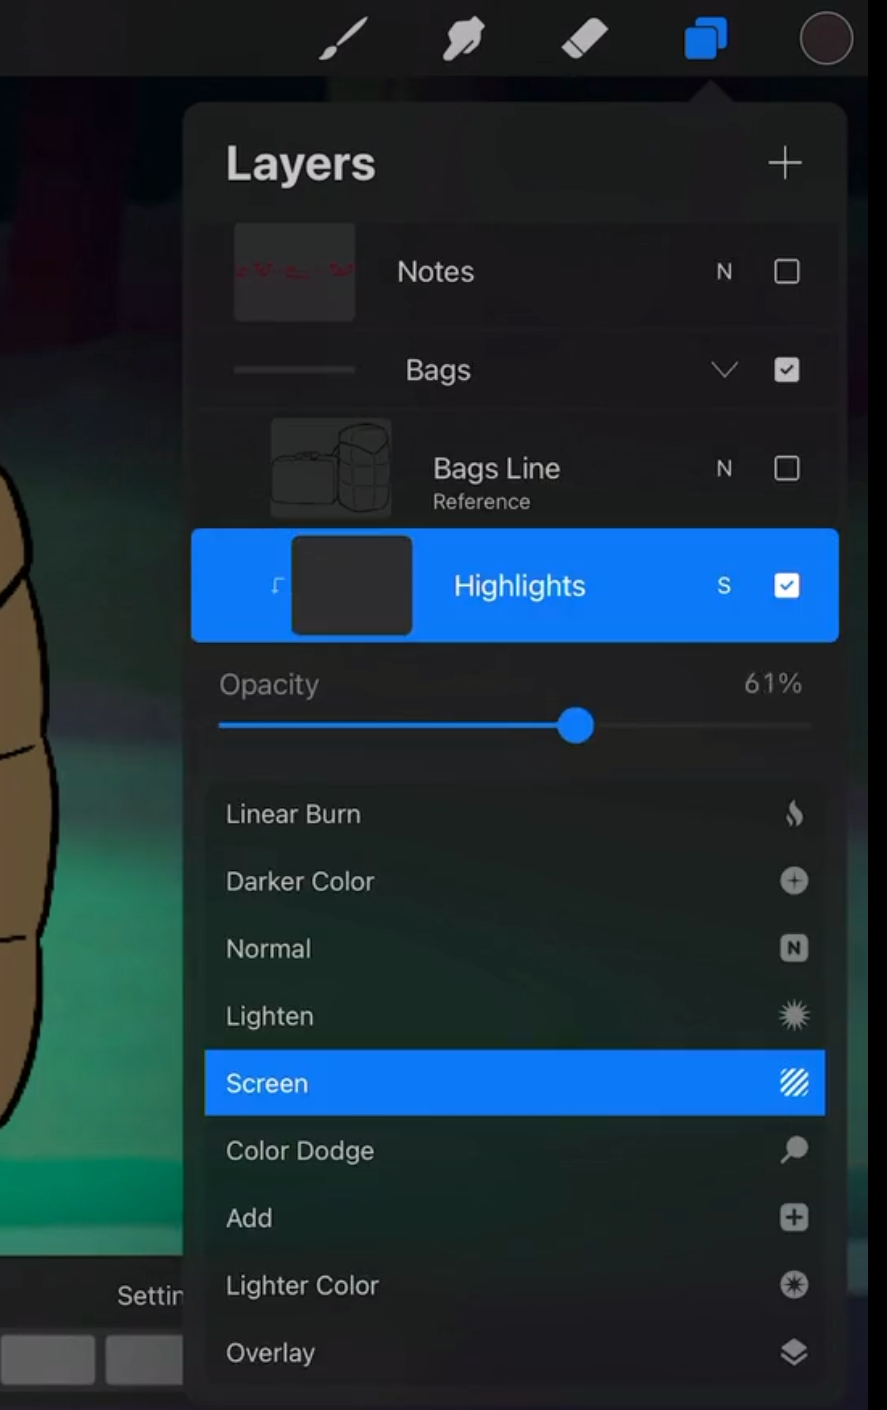
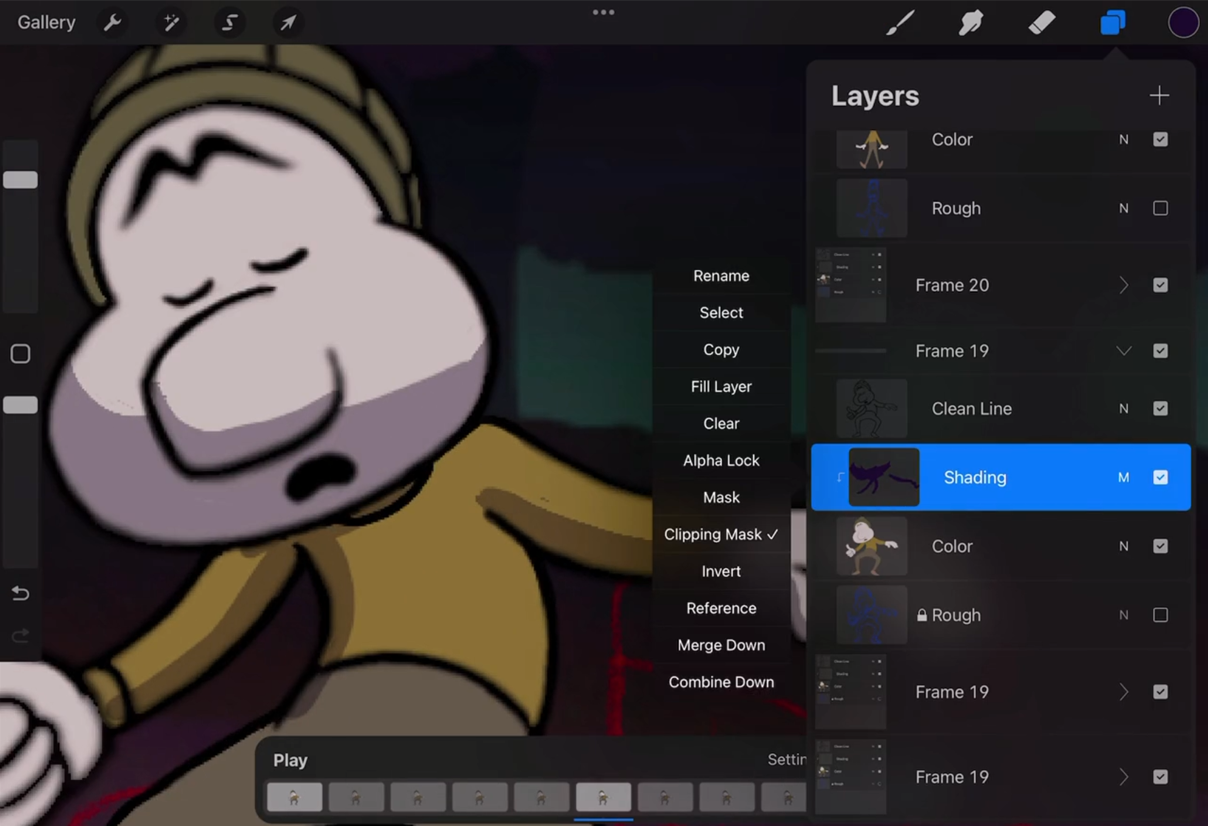
5. One Simple Trick to Master Shading and Highlighting
This trick will allow you to instantly add, remove, recolor, and edit any highlights and shadows you want to add to your animation.
Once you’ve finalized your cleaned and colored frames, create a new layer within your layer group and call it Highlights (or Shading).
Place this layer between your line art and color art – that way you can clip it to your color art without it affecting your clean line layer.
Next, go into the layer options and select Clipping Mask and make sure it’s clipped to your color art layer. Doing this allows you to apply effects like Multiply, Darken, Linear Burn, or Screen – without having to repaint your frames.
One More Step to Become a Procreate Animation Pro
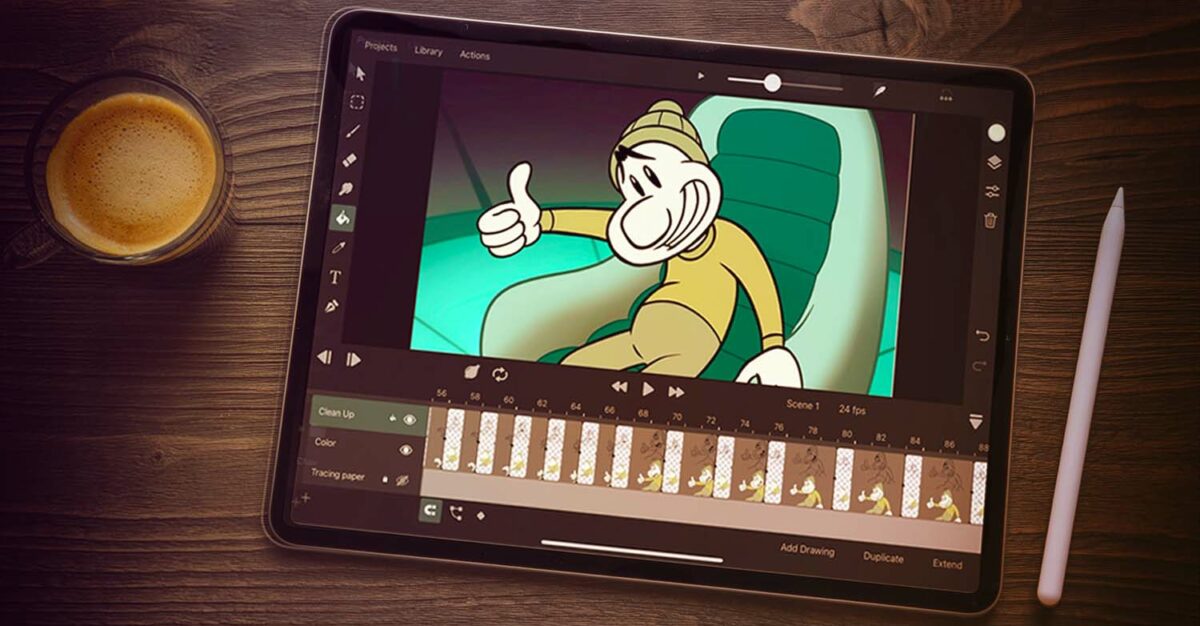
If you’d like to become a Procreate Animation Pro, we’ve put together a course covering absolutely everything there is to know. In fact, we’ve even gone a step further and covered how to produce an entire animated short film – from script writing, to storyboarding, to animating, to sound design, to compositing – using only your iPad (with inexpensive or free apps – including Procreate).
This course is designed for aspiring animators and professionals alike who are interested in honing their craft on an iPad. Learn more about this course and give it a try here.
iPad Animation course
A complete course to animating an entire animated short, from start to finish, using an iPad. When paired with the precision of the Apple Pencil, the iPad provides an outstanding animation experience. Don’t just take our word for it – try it out for yourself, and we’ll show you how.