Have you been working on a CG character performance and want to take it to the next level?
Here are three master tips from Blender character animator expert Dillan Gu to consider before starting your next character performance.
1) How to Animate Exceptional Character Performances
Do you know what separates a mediocre character performance from an exceptional one?
It’s not just the acting performance a character does – like smiling when happy, or throwing arms in a tantrum.
There’s another type of performance that’s just as important as acting, if not more so.
This second type of performance is how your character’s natural body reacts to their acting choices. In other words, it’s how your characters’ body is offsetting weight, keeping balance, or reacting to momentum in everything they do.
For example, if your character is doing a barrel roll:
- How does their weight impact the roll?
- How do the legs follow through?
If your character is talking on the phone during a bumpy train ride:
- How are they distributing weight between their legs
- How does their arm hang and sway with the bumps?
Nailing these types of details can create a convincing and natural performance and can be accomplished by considering these three things:
- Weight: Where is the weight expressed in your character?
- Balance: How is your character keeping balance?
- Momentum: What parts of the character are reacting to momentum (like hair)?
An easy tip to get better at animating a performance is to do what the most experienced animators do – study reference footage, or by recording yourself doing the action.
It may seem like simple stuff, but extra attention to weight, balance, and momentum can elevate your character’s performance.
2) A Better Animation Technique Between Keyframing and Straight Ahead
Have you heard of the “Layered Animation Technique”?
It’s not quite pose-to-pose, and it’s not quite straight-ahead. It’s something in between.
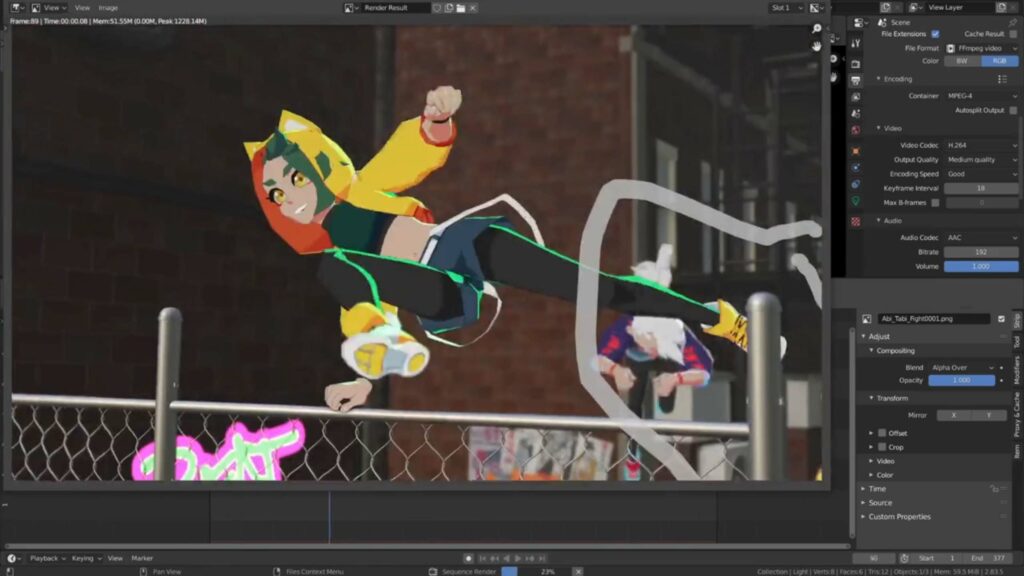
This technique is used by many Blender experts like Dillan Gu to perfect CG character action sequences, especially in complex environments – like running and jumping through an alleyway.
It works by animating one layer of a character – like their torso – completely through a sequence, before animating anything else.
Below is an example of this.
In this Blender scene, the character’s torso is being animated to do a front flip over the dumpster. It looks a bit silly since the legs haven’t been animated and are still on the ground.
However, the advantage of this method is its simplicity in determining both the timing and spacing of the move, without requiring additional animation of other elements.
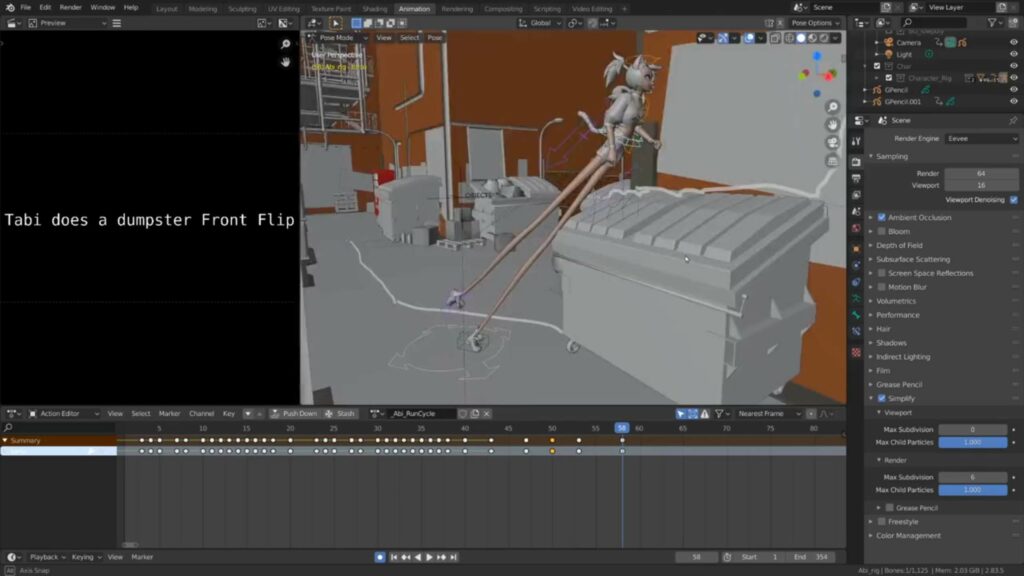
Once you’re happy with this first layer (in this case, the torso), you can animate everything else – like the legs, or arms, by following the rules of balance and inertia.
Overall, animating this way is faster and brings more flexibility since you can change a character’s overall actions upfront before committing to animating everything else – unlike keyframing, or straight-ahead animation.
Layered Animation does have its drawbacks though. For instance, if you need to go back and change something, like the overall motion of an arm, then you’ve got to reanimate the arm through the whole sequence.
Nevertheless, this type of animation can save you a lot of time in the long run.
3) What The Experts Do Before Animating Anything (also a huge time saver!)
While it’s standard practice to create a storyboard, and even an animatic before diving into animation, here’s a technique that is much faster and simpler to execute, while accomplishing much of the same intention.
Timed text-based descriptions.
Here’s how it works:
Say you want a shot with a hero being chased through an alleyway, who then turns around and fights her attacker (like the chase sequence from our Blender Animation course).
First, write out all the actions you want your character to accomplish:
- Hero runs through the alleyway
- Hero slides to a stop and turns around
- Attacker catches up
- Attacker throws punch
- Hero blocks punch
- Hero throws kick
Next, open up any video editor – for this example, we’ll use Blender, since it already has an easy-to-use built-in video editor.
Add each of these actions to text strips in the Sequencer (see below).
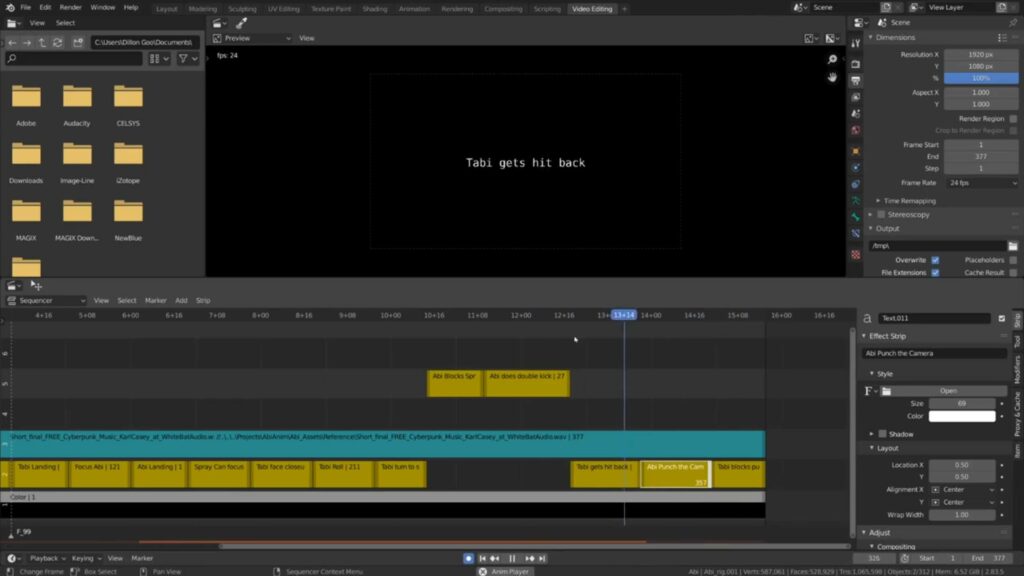
Next, adjust the length of each text strip until you’re happy with how the sequence plays out. You can also load in an audio track if you’d like to time it to music.
Now, just play back the sequence until you’re happy with the timing, and you’ve got a great base to start animating from.
You’re essentially creating an animatic, but skipping the step where you draw all the pictures, and instead just write out what happens in each scene with text.
Doing this step upfront can save a lot of time animating afterward since it’s a great way to cut out clunky shots, tighten your action, reorder things in the most cohesive way, and figure out the timing for each shot.
Bonus: Polish Your Character Animation Further with This Step-by-Step Guide in Blender
If you’re ready to elevate your character animation using Blender, we’ve created a comprehensive course with expert Blender animator Dillon Gu that covers everything you need to create a portfolio-ready character reel, including:
- An in-depth look at how eyes, eyebrows, and mouth shapes can enhance your character expressions
- Using simple special effects to make your characters’ actions pop
- Lighting tips for highlighting character key moments
- Plus extras, like adding line art for extra stylization
Want to learn more? Check out our Blender Animation course
This course is designed for aspiring animators and professionals alike who are interested in honing their craft using Blender. A true masterclass from one of YouTube's most popular Blender animators.