After Effects boasts a huge variety of tools, offering near-limitless possibilities for editing compositions, creating special effects, and of course animation.
Despite this, many animators feel intimidated by the learning curve of animating with After Effects, often choosing seemingly simpler programs instead. However, once you grasp how to navigate After Effects effectively, animating within it becomes surprisingly straightforward.
In this post, we’ll guide you through the exact process of setting up and animating in After Effects using their keyframing and graph editor tools, all in a matter of minutes.
Keyframing in After Effects is Easy, Just Follow These Steps
Keyframe animation involves transitioning an object from one state to another by defining keyframes at each state. These keyframes serve as reference points for the object’s position, scale, rotation, etc. To create the illusion of movement between keyframes, various methods can be used such as hand-drawing the “inbetweens” or using software like After Effects for interpolation – the process of automatically generating the inbetweens.
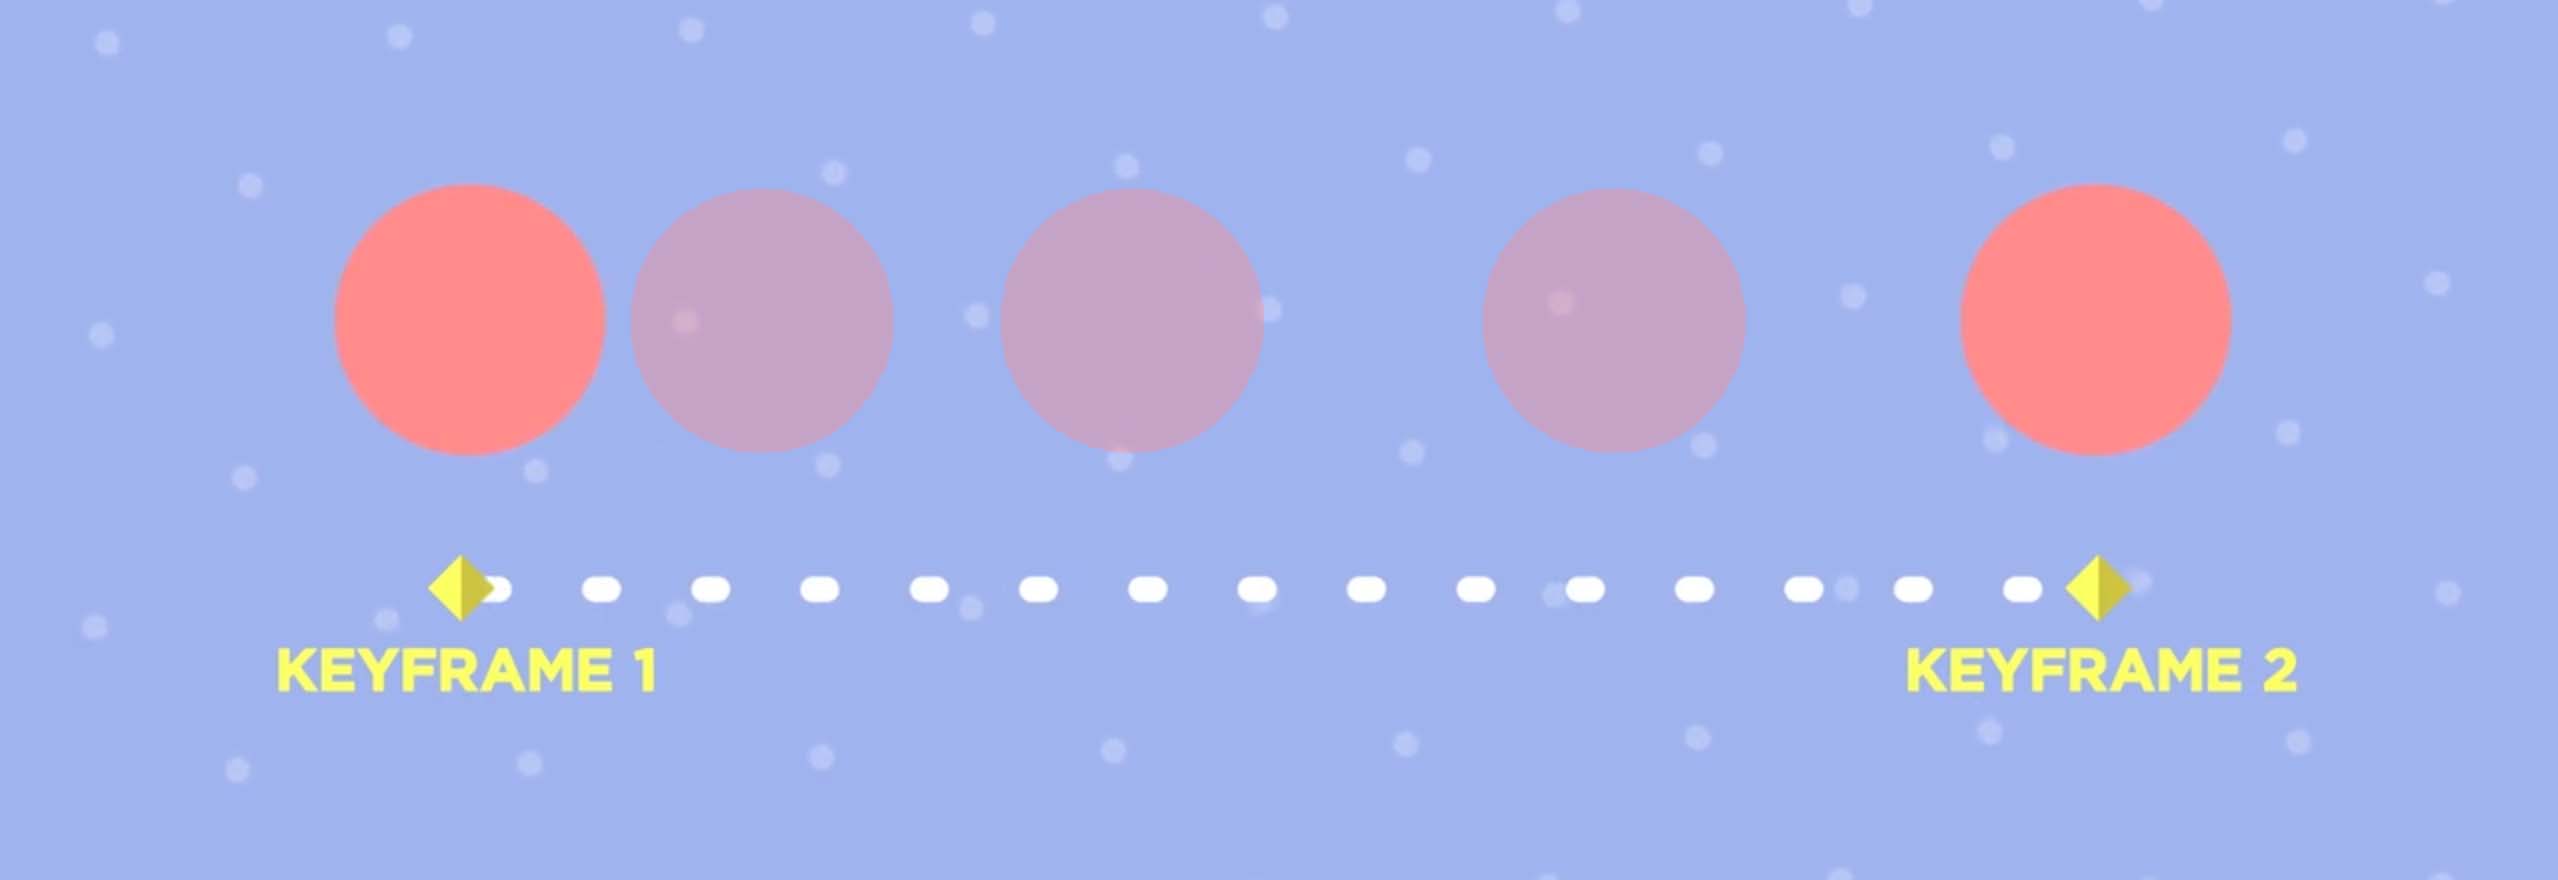
Here’s how to set your keyframes and enable interpolation in After Effects
To start, choose an object within your Composition and access the Transform menu underneath it. Then, click on the stopwatch icon beside the Position attribute. This action not only sets a keyframe but also enables keyframing for the selected object over time.

After you’ve set your first keyframe, slide the playhead forward a few seconds on the timeline. Then, click and drag your object within the Composition window. As soon as you move your object, a new keyframe is automatically generated. Now, when you playback your animation, you’ll see your object moving between the two keyframes.
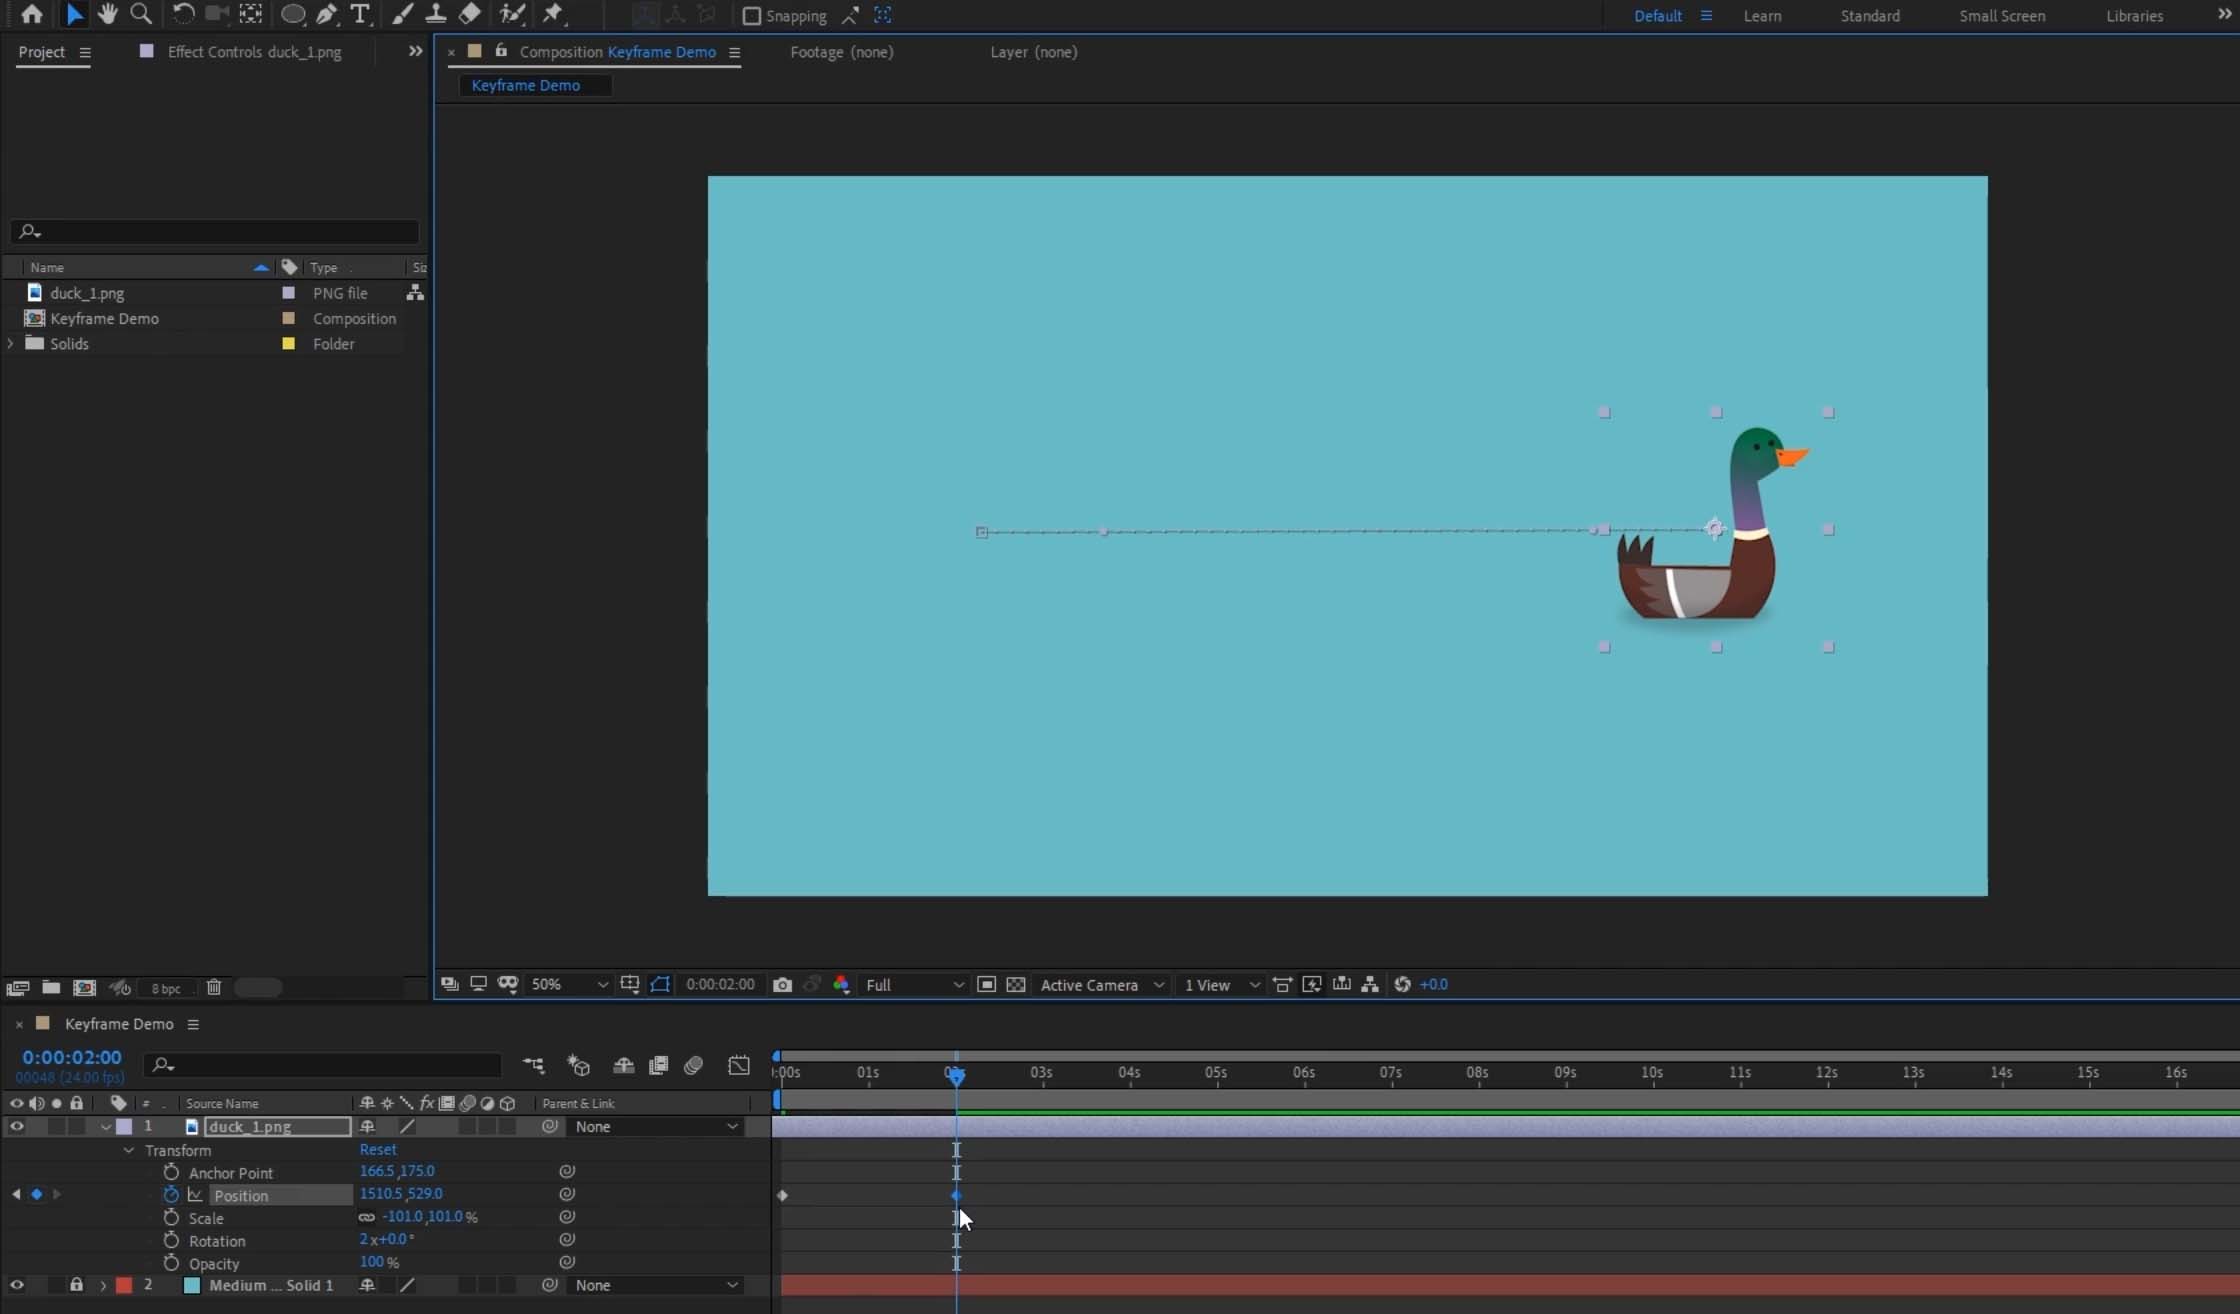
You’ll quickly notice that similar to other animation programs, After Effects generates a consistent or linear path between all the keyframes you add. However, we don’t want to keep this linear movement as it doesn’t look very natural (remember the animation principle of timing)
How to Ease In and Out In Just a Few Clicks
There are a couple of methods to change the timing from linear to something more natural.
One method is to manually add new keyframes and adjust the timing between each keyframe by eye. While this method can allow for very precise control, it can be time-consuming. Additionally, if you need to make changes to the animation later, it can become challenging to edit.
Another common approach is to simply ease in and out the speed between each keyframe. After Effects offers a few options on how to do this. The first is called Easy Ease.
To access Easy Ease, right-click on your timeline, select Keyframe Assistant, then Easy Ease.
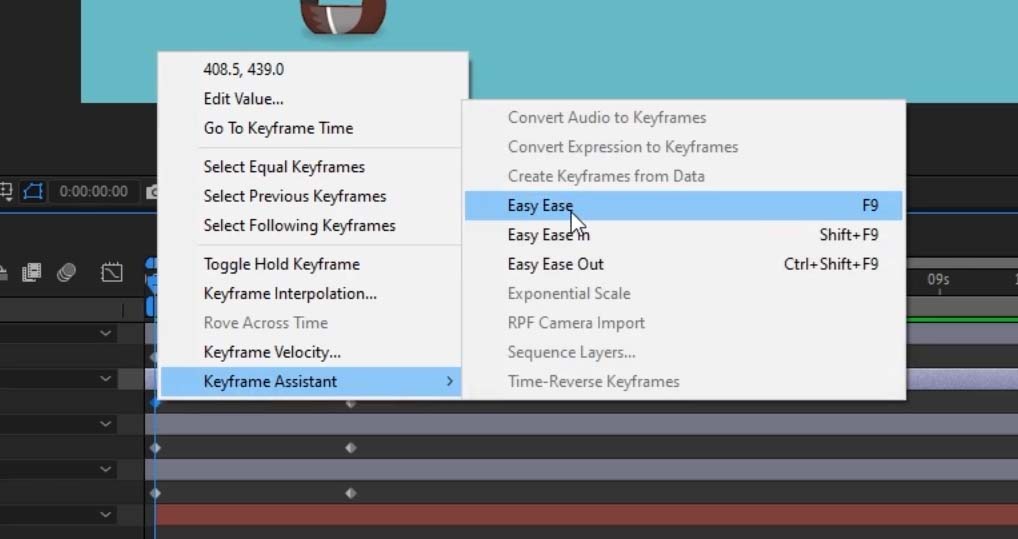
Adding Easy Ease automatically adds a bezier to your keyframes, easing in from zero at the start of your animation, speeding up the animation towards the middle, and easing out of the animation until the velocity reaches zero again.
This produces a very natural-feeling animation between your two keyframes.
Alternatively, you can decide to add easing manually by selecting Easy Ease In and Easy Ease Out from the same menu, which does exactly what they say.
A quick tip: You can easily identify which keyframes have eases applied to them as the keyframe icon will change to an hourglass, like in the image below.
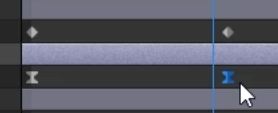
While using Easy Ease is, well, easy, it doesn’t always create the movement you need. If you’re looking to manipulate your eases with much more control, you’ll want to access After Effects’ Graph Editor.
Graph Editors Make Advanced Interpolation Easy
The After Effects Graph Editor visualizes the interpolation between keyframes and offers a way to maintain precise control over the timing and movement between those frames.
To access an object’s Graph Editor, select the Graph Editor button above the timeline.

In the image above, the yellow squares are the keyframes. The red diagonal line indicates movement between the two keyframes on the X-axis. The green line indicates movement between the two keyframes on the Y-axis.
As you can see, the red line is sloped. This indicates a linear movement of the selected object along the X-axis, while the flat green line indicates there is no movement along the Y-axis.
If you were to play this animation back, the object within the composition would simply move from left to right on the screen at a linear pace.
Again, you can right-click on the yellow keyframes and select Easy Ease to automatically ease in and ease out your animation. Once you do so it will look something like the below image.
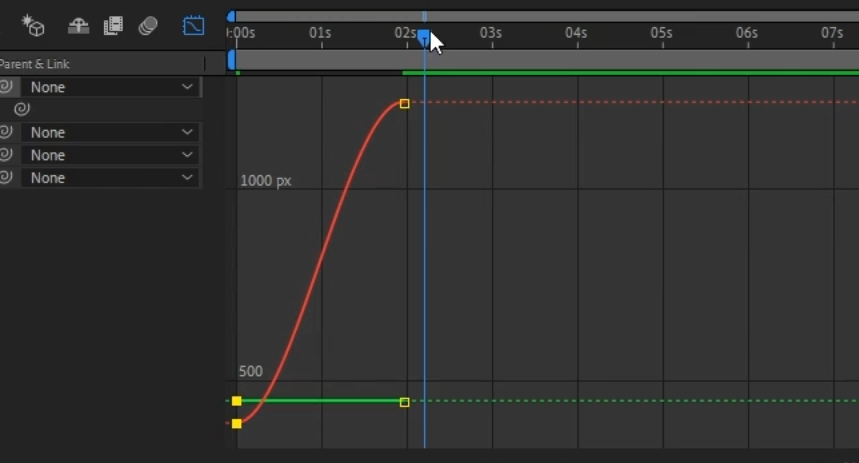
Here you can see how the red and the green lines have changed from straight to curved. These curves signify the easing in and out of the animation at the start and end. The slope of the line indicates the animation’s speed, where the steeper the slopes, the faster the animations.
Since both the red and green lines have slopes above, if you were to play back the animation, the object would move diagonally across the screen (translating on both the X and Y axes). The object will start at a complete stop, ease in, become faster towards the middle, then ease out to a complete stop.
If you’re looking for even more control over the easing of the keyframes, you’ll want to open what’s called Speed Graphs.
Speed Graphs show how quickly objects are moving, and offer even more precise adjustments to easing.
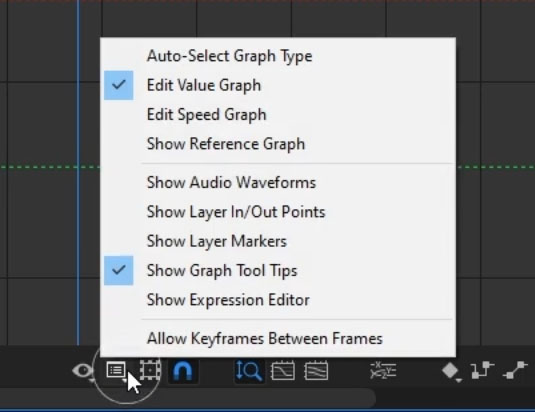
To access Speed Graphs, click the menu button at the bottom of the timeline and select Edit Speed Graph.
Below is an example of what you’ll see in your speed graph.
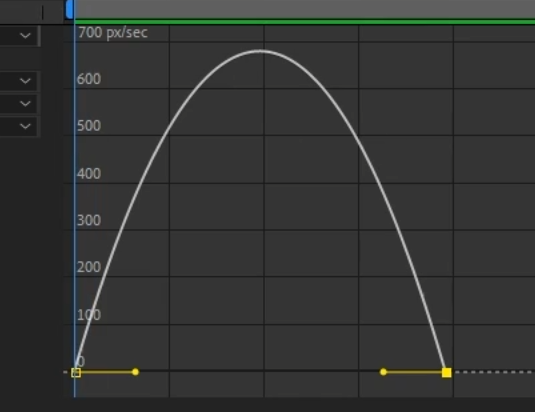
This arch represents how fast your object is being animated at any point. Just as in the Graph Editor, a steeper curve indicates faster movement, while a less steep curve indicates slower movement.
In the example above, the object starts with zero velocity at the beginning, increases in speed until it gets to its fastest point in the middle, and then decreases in speed until it reaches zero at the end.
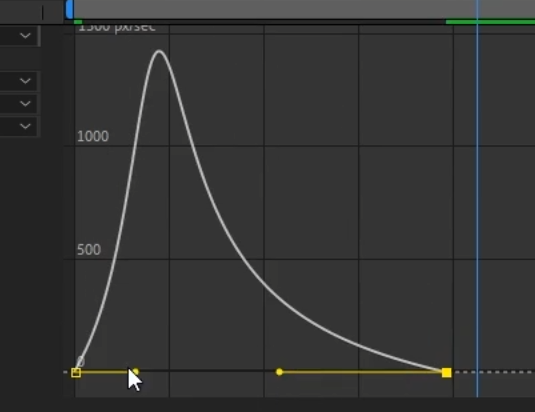
You can adjust speed easily by dragging the yellow bezier handles, increasing or decreasing the slopes they’re attached to.
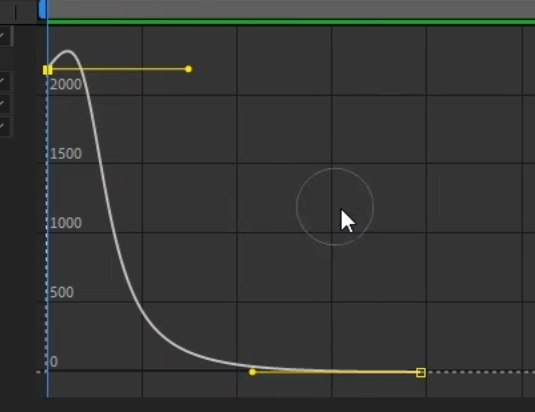
In the below example, the curve has been changed by dragging the bezier handles. Now the animation starts fast, then slows down considerably at the end until coming to a complete stop.
You can also move the yellow keyframes up and down vertically on the graph. Doing so will change the starting and ending speed of the animation.
In the image below, the starting frame has been moved up on the graph.
Now, instead of starting with zero velocity at the beginning of the animation, the object will already be in motion when the animation starts.
Mastering keyframes and Graph Editors in After Effects lays the groundwork for all types of animation. Once you’ve mastered these controls, the possibilities for your animations become endless.
Want to learn more? Check out our After Effects Animation course
We’ve designed this course specifically for aspiring animators and motion graphics artists. We'll cover animating logos, rigging characters, and animating an entire shot from start to finish.


